
Discover how to make eco-friendly crafts with a 3D pen this St. Patrick's Day! Get inspired with various project...
Discover how to make eco-friendly crafts with a 3D pen this St. Patrick's Day! Get inspired with various project...

Discover the essential 3D pen safety tips you need to know to avoid accidents and ensure safe use of this innovative...

Discover the beauty and creativity of 3D pen flowers with these 9 stunning examples. From intricate designs to bold,...

For those wanting to explore their creativity, 3D pens have become a popular tool for artists, hobbyists, and craft...

Valentine's Day is just around the corner, and what better way to show your loved ones how much you care than by...


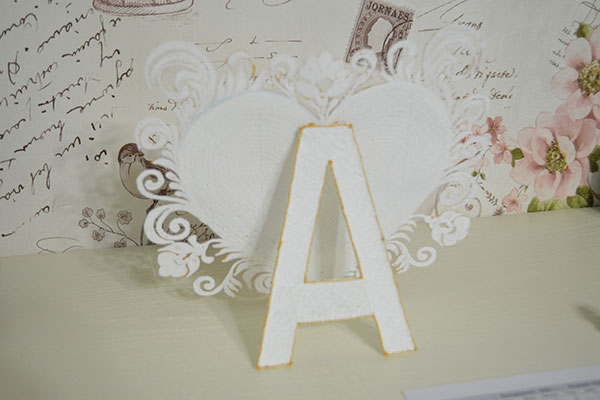
On the eve of St. Valentine's Day, which inspires all people in love to commit romantic actions, I also wanted to create something gentle and non-standard. After thinking everything over, I started making a photo frame that will suitably decorate our home.
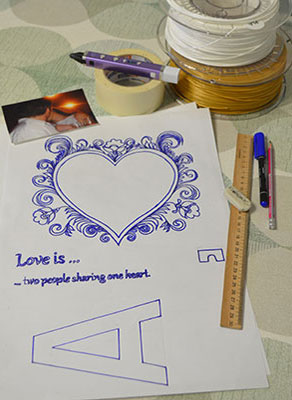
The first step, of course, is to think over all the details and subtleties of the work ahead. Having looked through the Internet, having thought about what I would like, preparing all the necessary materials, I proceeded to the first and crucial stage - I drew a stencil on the A4 sheet with a pencil. Realizing that everything suits me, I pointed the whole drawing with a marker, glued masking tape over the paper (the one that protects the surface when painting), chose the PLA plastic colours necessary for the work, prepared a 3D pen and started the process of creating the photo frame.
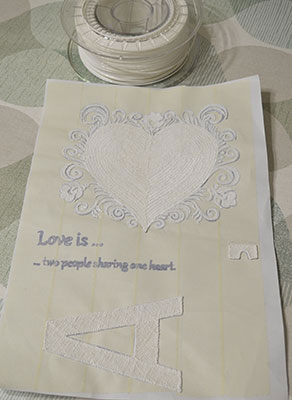
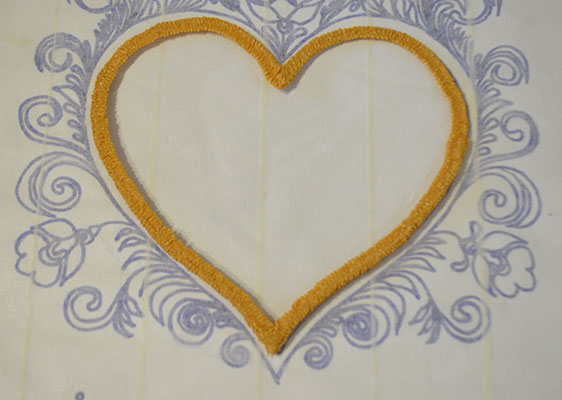
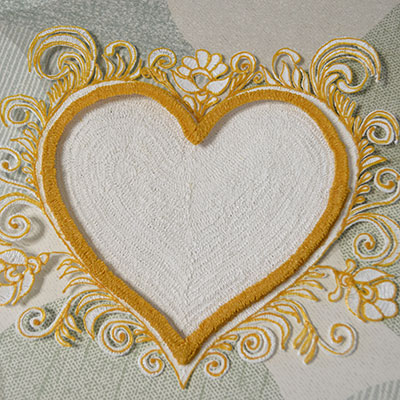
First of all, I painted the whole heart and the ornament around it with white plastic. Then the frame itself went through with another layer of white plastic. Thus, I drew the heart-frame itself in 2 layers of plastic, and the ornament in 1 layer. With the same white plastic, I fill in the holder for the photo frame in two layers.
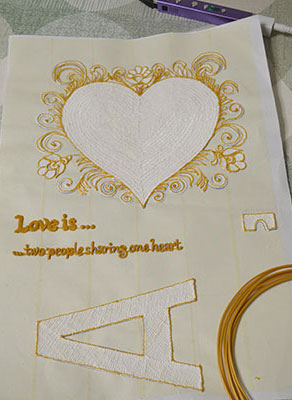
I changed the white PLA plastic in the 3D pen to gold. I drew accents along the ornament with light lines of gold colour, I outlined edging of the heart with gold colour, and the edges of the leg I also circled with gold PLA plastic. I let the finished parts freeze well, removing them from the stencil, and put them aside.
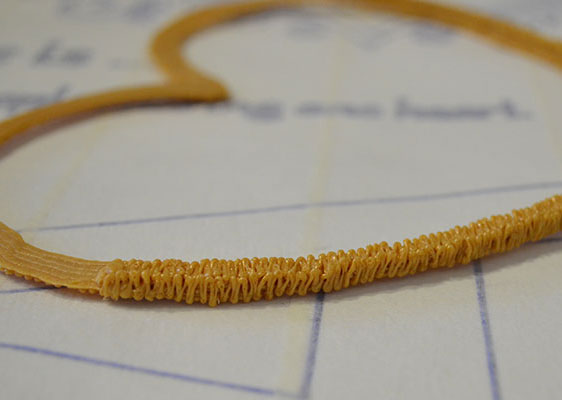
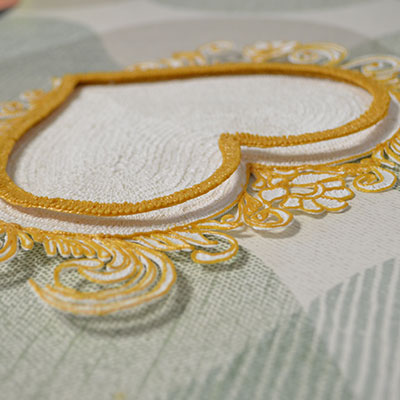
I drew the inner part of the heart 6-7 millimetres to the centre in two layers with same gold colour. I allowed them to solid well. I removed this part from the stencil and turned it upside down. Leaving the upper part of this detail untouched, so that there is a hole you can insert a photo in, I drew the edge of this heart to the bottom like a thin fence. I repeat all the movements 4-5 times to create an edge, which helps to hold a photo in a frame.
Then I carefully connected the lower and upper parts of the heart with the same gold colour.
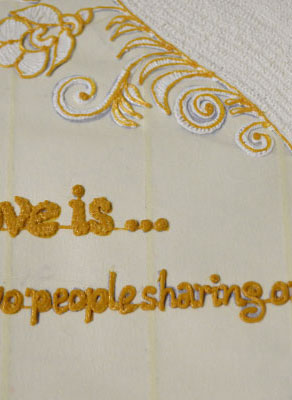
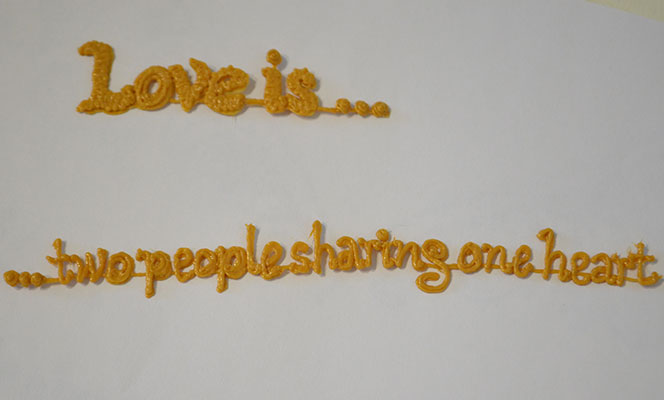
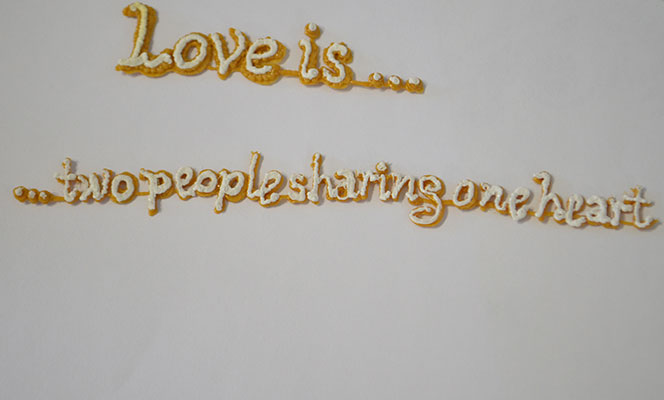
I started to create the inscription - a very delicate and fragile work. You should do everything very carefully and slowly. You should do work at the minimum speed of the 3d pen. Trace a thin line with gold plastic on the top of inscription. Then I wrote all the letters very carefully to make it clear and understandable. I allowed them to solid well and made the inscription with another layer of plastic. I repeat once again that you cannot do it in a hurry - carefully, slowly, at the minimum speed. We do the same steps for the bottom inscription. Let the parts solid well, feed the white plastic into the pen. And at the minimum speed, with thin lines, slightly touching the letters themselves, we direct the inscription in white.
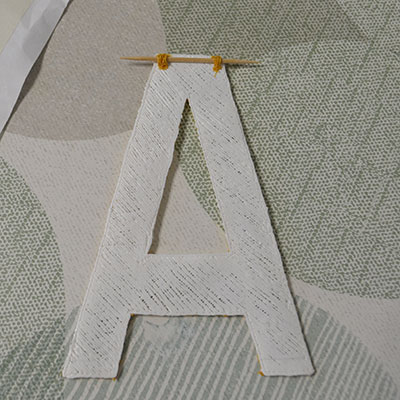
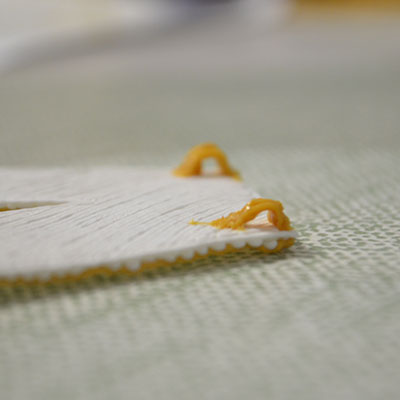
We change the plastic in the 3D pen to gold again and make loops on the frame itself and the leg. We apply a toothpick to the holder and complete, as it were, plastic loops so that you can remove the toothpick. Let these loops solid, put the stand to the frame you want to attach and mark the structure itself with a marker where the loops should be connected. We apply a toothpick to these marks and draw two circles on the frame itself in the same way as on the leg. Let them solid well. We attach the holder to the structure and connect these parts with a toothpick. The holder should open and close well. If everything worked out, then bite off the edges of the toothpick with pliers.
All that remains for us is to attach the inscription on the front side of the frame if you like everything you stick to the inscription's neat dots and insert a suitable size photo. In my case, the photo format is 9 cm x 13 cm.
I think such a frame can please any romantic and decorate a cosy nest where love lives! A place of residence has already been found in our house of such beauty.
Happy Valentine's Day! Do not be afraid to love and give your feelings to your soul mates because
There is only one happiness in life to love and be loved. (George Sand)


 Go green this St. Patrick's Day with a 3d Pen
Blooming with Creativity: Explore the Possibilities of 3D Pen Flowers
3D Pen Crafts the Perfect Valentine's Day Gift: 14 Unique Ideas!
TOP 10 gifts for March 8, made with a 3D pen
Happy New Year! How to draw a Snowman under the Christmas tree!
Go green this St. Patrick's Day with a 3d Pen
Blooming with Creativity: Explore the Possibilities of 3D Pen Flowers
3D Pen Crafts the Perfect Valentine's Day Gift: 14 Unique Ideas!
TOP 10 gifts for March 8, made with a 3D pen
Happy New Year! How to draw a Snowman under the Christmas tree!
Latest comments